MantisBT Readme file
created by The GlobalSolutions
MantisBT is an open
source bug tracking system commonly used to track software defects while
developing and releasing products.
We have made it easy
for the user to start using the feature of the product rather than to spend
time in installing and configuring the product.
Introduction
This
document walks you through the details of the installation location and the
steps to use the product features such as creating a project,
User,
assigning a project and creating defects etc.
MantisBT Installation
Details
|
Category |
Package |
Recommended |
Version Used |
Installed Location |
|
RDBMS |
MYSQL |
5.0.x or above |
5.6.17 |
C:\Program Files
(x86)\MySQL |
|
Web Server |
Apache |
|
2.2.27 |
C:\Program Files
(x86)\Apache Software Foundation\Apache2.2 |
|
PHP |
PHP |
5.2x or above |
5.4.45 |
C:\Program Files
(x86)\GS\PHP |
|
MantisBT |
|
|
1.2.19 |
C:\Program Files
(x86)\Apache Software Foundation\Apache2.2\htdocs\mantisbt |
MantisBT Database Details
|
Database Name |
Username |
Password |
|
Bugtracker |
Root |
MANTISbt1_2 |
Configurations that we would recommend you to change
Time zone
We have set the default time zone to “America/Los_Angeles”.
Once you deploy the AMI please change the time to your local time zone.
This can be modified by changing the “date.timezone”
property in php.ini file located in “C:\Program Files (x86)\GS\PHP”. Below is
the property
and value that is
currently set,
date.timezone = "America/Los_Angeles"
is used as a default time.
Mantis Email
Settings
Configuring the email setting is a challenging task. To demonstrate the
email integration we have registered a temporary Gmail account
Samplemantis@gmail.com and have used it show how the email transactions work in MantisBT. Once you get accustom to the features you
have to
Change to your company’s email server configurations in config_inc.php file. The temporary email account that we
have provided will be stopped at any time.
Below is the set of configurations that needs to be added to config_inc.php for email configuration, which is located at
C:\Program
Files (x86)\Apache Software Foundation\Apache2.2\htdocs\mantisbt. Currently the emails will work as it is
configured to Globalsolutions accounts, you have to
change to your gmail accounts to use the gmail smtp, the email accounts
with which we have configured will be stopped without any notice .
$g_allow_signup = ON;
$g_enable_email_notification = ON; //enables
the email messages
$g_phpMailer_method = PHPMAILER_METHOD_SMTP;
$g_smtp_host = 'smtp.gmail.com';
$g_smtp_connection_mode = 'tls';
$g_smtp_port = 587;
$g_smtp_username = 'Your gmail
account@gmail.com';
$g_smtp_password = 'Your gmail
password';
$g_administrator_email = 'Your admin email
account';
Desktop Icon
changes
Right click on the desktop icon “MantisBT powered by theGlobalSolutions”
and go to properties.
In the “URL” field replace the “localhost” with your ec2 public DNS name.
For example:
The “URL field will initially look like http://localhost/mantisbt/
Once you replace with the YOUR public DNS it should LOOK LIKE http://ec2-54-82-61-141.compute-1.amazonaws.com/mantisbt/
In the above URL field please make sure to replace with your ec2 instance
and not the one in the above example.
In your security
group of the VM you are launching make sure to add an
“http” rule so you can browse from outside the VM where MantisBT
is running.
Note –
·
The above modification (desktop icon url field change and Security group change) is ONLY REQUIRED if your
users access MantisBT from other computers or yourself connecting and testing
the capabilities from another box. If you are confining your testing to the same ec2 server where MantisBT
is running you don’t need to edit the properties of the shortcut or follow the
above steps.
Getting
started with MantisBT (The below steps will quickly help you to navigate
through the application)
Your MantisBT
application is already installed and ready to use. You have to perform the
following steps from an administrator account to
start using the functionality of MantisBT,
1.
Create a user by providing
his email information
2.
Create access levels based
on the different users in the projects
a.
A user who will have access
to report defects ( Consumer)
b.
A user who will have access
to work on the defects (Developer)
c.
A user who will have access
to update the defects on the test results. (QA Engineer)
3.
Create projects and
associate them with the appropriate user
Now we will go through the steps to achieve
the above.
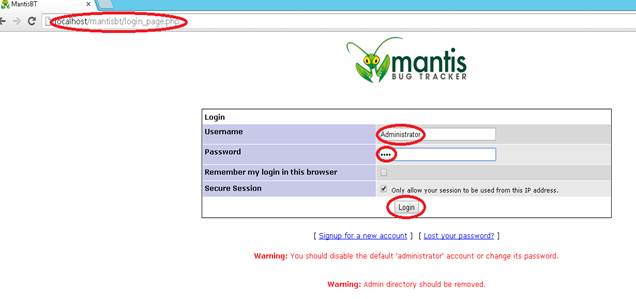
You can Login in to
MantisBT either by clicking the MantisBT shortcut icon in the desktop or by going
to the following URL http://localhost/mantisbt/login_page.php as
shown in the below snapshot. Please use
the Username as Administrator and
password as your “INSTANCE ID” of your instance which
you can get it from the EC2 console -> under your instance descrption.
Once you are logged
in click My Account as shown in the below snapshot and change the password from
the default value which you will
use it moving forward. Also please enter a valid email-ID for the administrator
user.

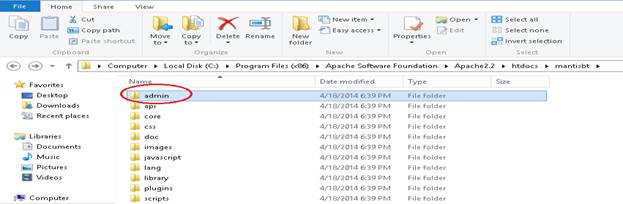
Remove the “admin1”
directory after changing the Admin details as shown below. The “admin1” directory is needed only for
installation process
and hence it should be removed after you have changed your administrator
password.
Note: the below image refers to admin but in your file
system you will see admin1
1& 2 - Creating a USER &
providing required access level
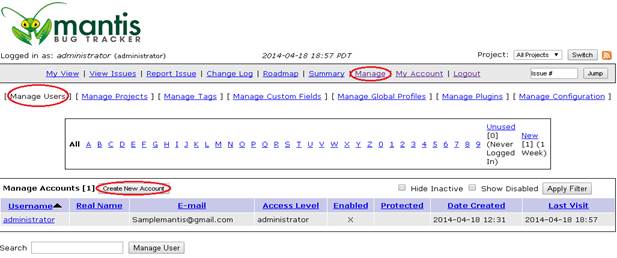
To create and manage
users in MantisBT, click on “Manage” followed by “Manage Users” as shown in the
below snapshot. To create a new
User click on Create New Account and enter the following details (user name,
email and access level), the user
will automatically receive an invitation
email. The User can then activate their account by entering into MantisBT with
the Password and change
his/her password.
·
Administrator
has to enter their Employee name and their email id when creating the New User.
·
Administrator
is the one who can assign the Access level to their users.
Below is the snapshots which walks you to create the
users and associate them with required configurations.

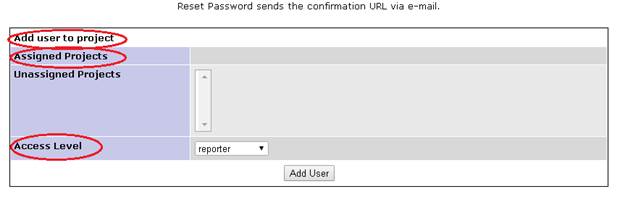
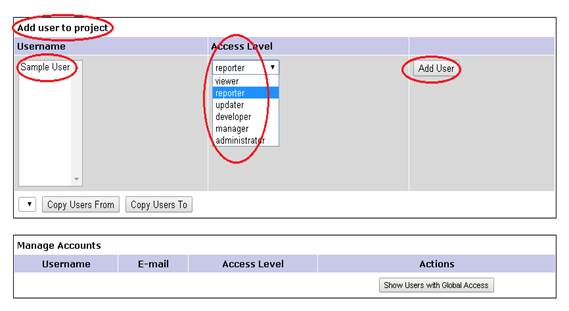
Below snapshot details the steps to associate
the “Sample User” created above to a project, its corresponding access level to
that project created
in the previous step. Access level defines what users can do in the defect
tracking system set by the administrator. The sample user that we have created
has an
access level of that of a manager. This access level can be modified at any
time by the administrator. Below are the access level available and
their permissions.
§ Administrator : Administrator is more powerful than any other
User. Can create and delete users. Grant privileges to all other Users and
more.
§ Manager :
Has more Privileges
over developers, can assign projects to users and manage the Projects.
§ Developer : Works on a
Project, has more Privileges than updater.
§ Updater :
Who can report new
Bugs and update the bugs.
§ Reporter :
Who reports new bugs
and can add a bug notes.
§ Viewer : Who
can browse and view bug listings.


The below
configuration describes the default email preference that is set for the user
based on the access level chosen, please pay attention
to the access level you have chosen and set the appropriate email notification
by checking the below parameters.
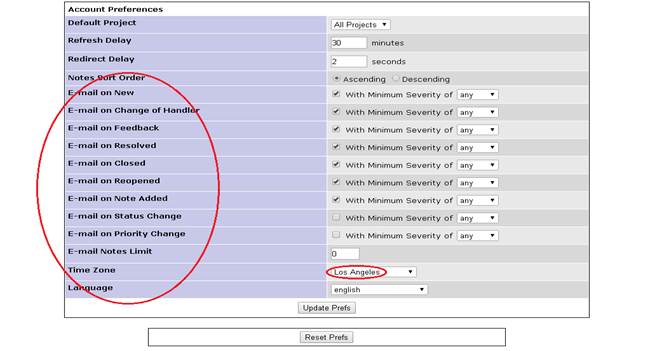
Click “update prefs”
to complete the user configuartion.
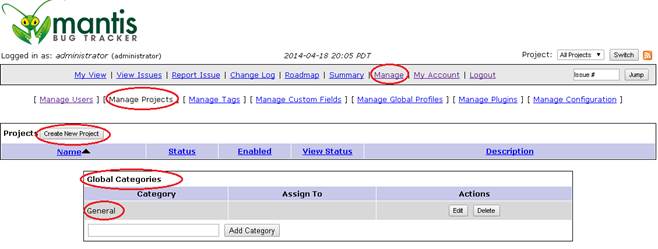
3 - Managing Projects and Categories in
Mantis
To Create and manage
projects click on Manage followed by Manage Projects. Click on “create new
Project” to create a project.
When reporting a bugs against a specific project, the bug will be associated
with a category as well.
The main purpose of
Categories is to obtain meaningful reports on bugs by type, frequencies,
severity or occurrences during the stages
of development. The categories can be global or specific to a project.
If the categories is
global then each project can use them to report bugs specific to the project.
If it’s specific to a
project then the bugs related to that project will be entered in those specific
categories.
NOTE: You will need
to have at least one category either specific to a project or global to start
reporting bugs in Mantis. By default, your
application comes with the category “General” installed as a Global Category.
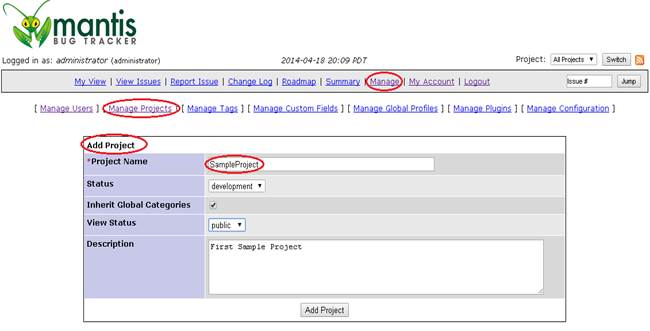
Status: Describes the current state of the project like, development, testing,
beta etc.
View Status: Public or Private, as
the name implies if set to private people who are part of the project will only
be able to see it and ones
classified under public will be seen by everyone.
Inherit Global Categories: If
selected, the global categories defined in your application will be allocated
to the project.
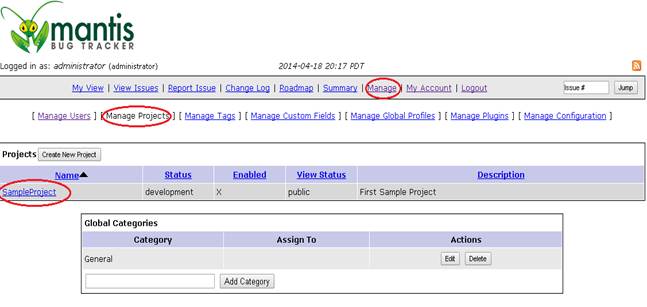
To manage the project
click on the particular project. Here we have shown a “SampleProject”
for which category and users are getting assigned.
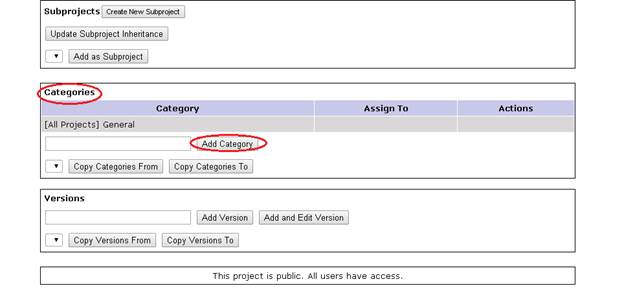
Subprojects: To create projects attached to the main project.one
have to create the subproject as a separate project and link them afterwards.
Users: To assign users to the project. This is where you can choose to
allocate access levels particular to this project that may be higher or
lower than the Users global access level which is explained earlier.

On Assigning the
Project to the user, an email will be sent to the User automatically.
Filing Bugs in Mantis
Your application is
now ready to file and report bugs for the sample project created. To file a
bug, click on Report issue on the top menu.
Now you have to fill the following details in the form.
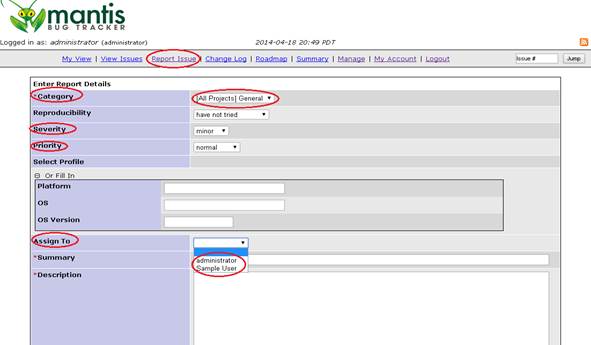
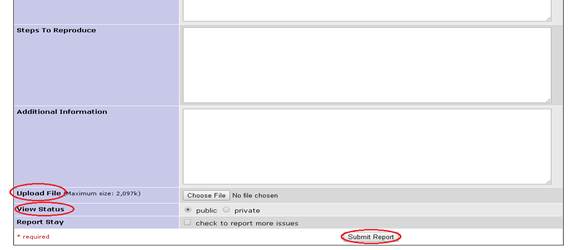
Each and every bug
has to be assigned to a user who will receive a mail from the application to
let them know about the assignment and
provide a summary of the issue.
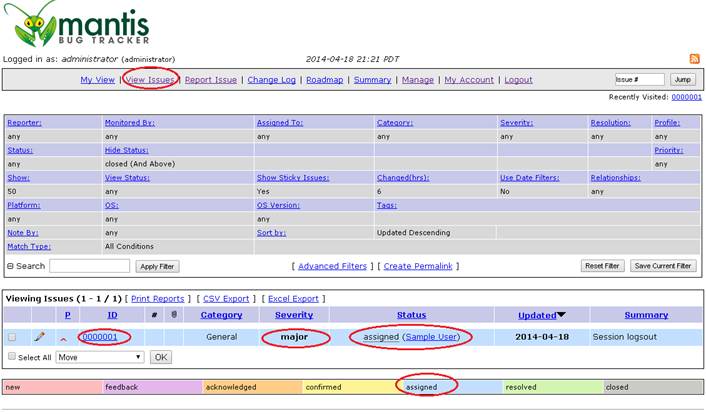
View Issues in MantisBT
Depending on their
access level one can view the issues by clicking on the View Issues in the
form. By clicking on My View, Users can see all
the issues they reported as well as the issues that have been assigned to them.
In both views, it is possible to follow the progress made on the
issues and to edit them depending on the access levels granted.
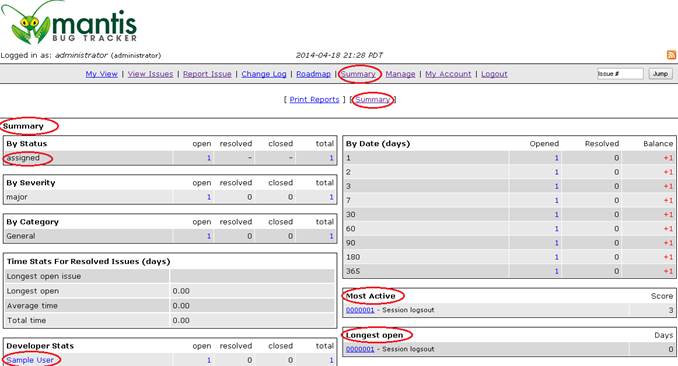
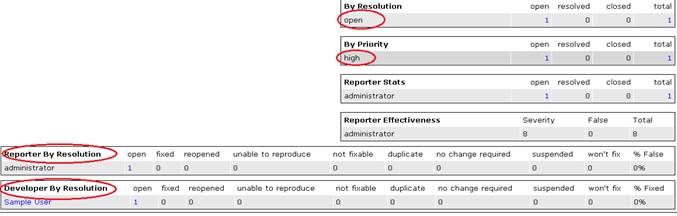
Reports and Summary in Mantis
You can generate
reports in Mantis by clicking on Summary in the Main menu. By clicking the
Summary you can view all the issues.
Reports can be generated in MS Word format for export or in HTML format by
Issues and so on
If you have any questions on this documentation or issues while browsing
the preinstalled applications in Amazon VMs please email us
support@theglobalsolutions.net